Showing posts with label ssl. Show all posts

Manual LetsEncrypt for cPanel

At work I recently collaborated with our hosting provider to move our company website to a version of cPanel. Up until this time, there has been no way of running our site on SSL/TLS, and it's been quite frustrating, having discovered LetsEncrypt and its ease of use. Basically, with this certificate signer, I have no reason to actually figure out the handshaking and signing process as was required in old command-line versions of SSL.

Well, our hosting provider's version of cPanel has not really been expanded to allow for LetsEncrypt, even though multiple people on the cPanel forums say there's a plugin available. Seems they don't mind forcing me to pay another fee on top of everything to get an annual signature from the two default signers they had enabled in the system.

This made me wonder, and think, well CertBot, which generates the certificates and private keys and runs the signing requests automatically, always talked about this "cert only" option, and here on their website, I see instructions for a "manual" option as well. I thought this may have been exactly what I was looking for, since my scenario is - I have a website on a host who does not have LetsEncrypt enabled, but does allow me to upload certificates and keys from an offline source.

Here is my process of installing a LetsEncrypt SSL/TLS DV certificate on a cPanel site not equipped to generate one automatically.

Create a new certificate with any subdomains we'd need using certbot certonly -d c-pwr.com,www.c-pwr.com --manual

Certbot warns you that the computer's IP you're generating the certificate on will be shared with them, even though it's not the server on which the cert will be installed on in the end. Type Y.

Without any "challenges" option in the original command, certbot assumes you're using the acme challenge which involves uploading a text file to your site. Using cPanel's file manager I simply do this.


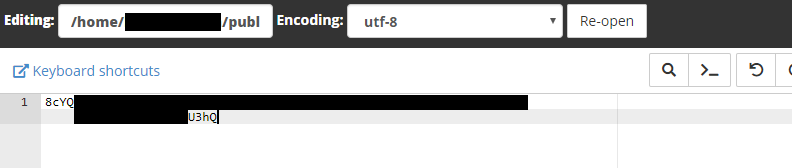


Once the first file in acme-challenges is created, certbot asks us to create another file in the same place with a different string as its contents.


Once both files are created and saved to this location, we probably should verify that the URLs certbot is pointing to are actually visible from the public web.


Knowing that I can access the challenge files from my browser, I assume certbot will also be able to access them, presumably from a curl command or something, so I let it continue.

If we get the standard certbot success message, we now see that it's created our certificate, chain and private key files in certbot's standard location (I'm using the PPA repository through aptitude, so certbot automatically installs the latest versions of my certificates to /etc/letsencrypt/live/c-pwr.com/, which are actually symbolic links to /etc/letsencrypt/archive/c-pwr.com/, as every time we renew, it will archive the old files and create new ones.

I now can copy the contents of both /etc/letsencrypt/live/c-pwr.com/cert.pem and /etc/letsencrypt/live/c-pwr.com/privkey.pem up to cPanel in their SSL interface.


After this, I head over to the Manage SSL Sites tool and install this certificate as-is. It automatically detects the domains I specified in the original certbot command and applies the certificate to them.


Back on the main site, I now can see that https://www.c-pwr.com now works, and gives me the certificate information including how long it will be valid.


At this point, I have no idea how the renew will work. Since LetsEncrypt issues certificate signatures for only 3 months, this will become an issue sometime in August. I HOPE the acme-challenges will remain the same, but if they don't, it should be a simple task to recreate the files as above, then copy the files in manually, assuming certificates and private keys can be edited once created in cPanel.
Renewing is super simple, but with this method must be run differently from certbot renew. I simply ran certbot certonly -d c-pwr.com,www.c-pwr.com --manual again. It asked me to create new acme challenges on the webserver, but since the cert already existed, it detected this as a renew, and did not prompt me to upload certificates a second time!! Just created two text docs, hit enter in my local server command line and it did everything from there.

Additionally, I should probably set up my .htaccess file to redirect any http requests to the https version. This is usually done automatically by certbot during an automatic installation, and is embedded in the /etc/apache2/sites-available/000-default.conf file, but since I don't have access to this, .htaccess will have to do.

LetsEncrypt List of Useful Commands

Here are a few letsencrypt commands that I've found useful in the past few months of trying it out.

Installation:

git clone https://github.com/letsencrypt/letsencrypt
cd letsencrypt

Note: for a few Debian installations, you can also install with:
apt-get install letsencrypt python-letsencrypt-apache

Other OS's are also supported. See https://letsencrypt.readthedocs.org/en/latest/using.html#operating-system-packages for details!

Generating new keys on Apache:

./letsencrypt-auto run --apache -d domain1 -d domain2 -d domain3

Loading pre-generated keys from a backup into a new installation:

#Need to have backed up /etc/letsencrypt/ to some 
# backup location. This will grab private keys, 
# public certs, symlinks to them, everything.
# More help at https://letsencrypt.readthedocs.org/en/latest/using.html#where-are-my-certificates
#
#Simply running the command, even to load help, 
# will bootstrap dependency installations and set 
# up the Python scripts if they haven't been set up 
# already.
./letsencrypt-auto --help all

cp -R /path/to/backup/letsencrypt/* /etc/letsencrypt/

./letsencrypt-auto --install -d -d -d --cert-path /etc/letsencrypt/live/domain1/cert.pem --key-path /etc/letsencrypt/live/domain1/privkey.pem --fullchain-path /etc/letsencrypt/live/domain1/fullchain.pem

To renew keys (keeping them the same, but extending the expiration date another 90 days):

#Special bash scripts intended for datestamp 
# checking to refrain from renewing certs
# younger than 60 days old are no longer 
# needed in LE version 0.4. Simply run the 
# following:
./letsencrypt-auto renew

OpenVPN

New project at work! Setting up OpenVPN. It's great fun...except when it doesn't work.

I love the Windows interface for setting up the Server. It's straight-forward, and following the tutorial at http://openvpn.net/index.php/open-source/documentation/howto.html works like a charm. Setting up the client is just as easy, and the connection can be made in a matter of minutes.

However, I started running into problems when I began trying to replicate the server over to Ubuntu 12.04. The tutorial once again was straightforward and everything SEEMED to work out. I could start up the server and everything. It was all good.

However, for some strange reason, I was unable to actually connect to the client. I would generate the certificate authority key, server key, and client key plus the Diffie Hellman number. Server again started up great. But after transferring the client keys to my Windows computer, and setting up the client configuration, I kept getting an odd error "Private key password verification failed."

Looking this error up, all I could find were forum entries on http://forum.openvpn.eu talking about making sure you didn't set a challenge password when generating keys and ensuring that the user/password authentication on your OpenVPN server was turned off. Both of these were true in my case, so no help.

Then I started thinking, could it be the age-old, infamous Unix vs. MS line ending problem? Let's find out! Opened each of the files, ca.crt, client.crt and client.key in a text editor in turn, made a slight change, undid it and saved the file to ensure they all had MS line endings.

Well....it was in this process that I found my big problem. Opening client.key (the private RSA key that the client would use when authenticating over SSL), I found that instead of a standard RSA hash, it read:


<html><head><br /><title>403
Forbidden</title></head><body><br /><h1>
Forbidden</h1>
<br />You don't have permission to access /Lynx/dp_m14x.key<br />on this server.<br />
<br /><hr />
<br /><address>
Apache/2.2.22 (Ubuntu) Server at 192.168.10.21 Port 80</address>
</body></html>


Oops.  Turns out that Ubuntu, when generating the key/cert via easy-rsa, decided to give the private key file root-only access, which, for this type of file is a *very good thing*. Thus, when attempting to access it via the standard Apache www-data user from the browser, it gave me a 403 which I did not see as I did a right-click > Save As on my directory listing of the file.

Attempted to instead copy it to my Samba folder and transfer it over to my Windows client that way. Still no go. Now I got Windows access errors "Could not read file..."

Finally decided to get smart about it.
cp /etc/openvpn/easy-rsa/keys/client.key /home/daniel/Documents
chmod 777 /home/daniel/Documents/client.key

rm /home/daniel/Documents/client.key

Now I just need to figure out how in the world to transfer it over without being so unsecured about it. Gzip?

-------------------------------
11-2014 Edit:
I recently had to rebuild my IP tables this last week due to some unforseen ISP issues. For future reference, here's what I had to input in order to allow OpenVPN clients full internet plus LAN access:

iptables -I FORWARD --ctstate RELATED,ESTABLISHED -j ACCEPT
iptables -I FORWARD -i tun0 -o eth0 -s 10.8.0.0/24 -d 192.168.10.0/24 -j ACCEPT
iptables -t nat -A POSTROUTING -o eth0 -s 10.8.0.0/24 -j MASQUERADE

It's also good to note that I did have to do a full server reboot to apply this.