Manual LetsEncrypt for cPanel

At work I recently collaborated with our hosting provider to move our company website to a version of cPanel. Up until this time, there has been no way of running our site on SSL/TLS, and it's been quite frustrating, having discovered LetsEncrypt and its ease of use. Basically, with this certificate signer, I have no reason to actually figure out the handshaking and signing process as was required in old command-line versions of SSL.

Well, our hosting provider's version of cPanel has not really been expanded to allow for LetsEncrypt, even though multiple people on the cPanel forums say there's a plugin available. Seems they don't mind forcing me to pay another fee on top of everything to get an annual signature from the two default signers they had enabled in the system.

This made me wonder, and think, well CertBot, which generates the certificates and private keys and runs the signing requests automatically, always talked about this "cert only" option, and here on their website, I see instructions for a "manual" option as well. I thought this may have been exactly what I was looking for, since my scenario is - I have a website on a host who does not have LetsEncrypt enabled, but does allow me to upload certificates and keys from an offline source.

Here is my process of installing a LetsEncrypt SSL/TLS DV certificate on a cPanel site not equipped to generate one automatically.

Create a new certificate with any subdomains we'd need using certbot certonly -d c-pwr.com,www.c-pwr.com --manual

Certbot warns you that the computer's IP you're generating the certificate on will be shared with them, even though it's not the server on which the cert will be installed on in the end. Type Y.

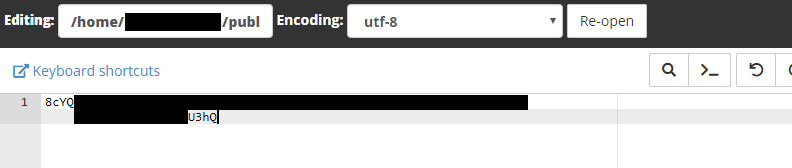
Without any "challenges" option in the original command, certbot assumes you're using the acme challenge which involves uploading a text file to your site. Using cPanel's file manager I simply do this.


Once the first file in acme-challenges is created, certbot asks us to create another file in the same place with a different string as its contents.


Once both files are created and saved to this location, we probably should verify that the URLs certbot is pointing to are actually visible from the public web.


Knowing that I can access the challenge files from my browser, I assume certbot will also be able to access them, presumably from a curl command or something, so I let it continue.

If we get the standard certbot success message, we now see that it's created our certificate, chain and private key files in certbot's standard location (I'm using the PPA repository through aptitude, so certbot automatically installs the latest versions of my certificates to /etc/letsencrypt/live/c-pwr.com/, which are actually symbolic links to /etc/letsencrypt/archive/c-pwr.com/, as every time we renew, it will archive the old files and create new ones.

I now can copy the contents of both /etc/letsencrypt/live/c-pwr.com/cert.pem and /etc/letsencrypt/live/c-pwr.com/privkey.pem up to cPanel in their SSL interface.


After this, I head over to the Manage SSL Sites tool and install this certificate as-is. It automatically detects the domains I specified in the original certbot command and applies the certificate to them.


Back on the main site, I now can see that https://www.c-pwr.com now works, and gives me the certificate information including how long it will be valid.


At this point, I have no idea how the renew will work. Since LetsEncrypt issues certificate signatures for only 3 months, this will become an issue sometime in August. I HOPE the acme-challenges will remain the same, but if they don't, it should be a simple task to recreate the files as above, then copy the files in manually, assuming certificates and private keys can be edited once created in cPanel.
Renewing is super simple, but with this method must be run differently from certbot renew. I simply ran certbot certonly -d c-pwr.com,www.c-pwr.com --manual again. It asked me to create new acme challenges on the webserver, but since the cert already existed, it detected this as a renew, and did not prompt me to upload certificates a second time!! Just created two text docs, hit enter in my local server command line and it did everything from there.

Additionally, I should probably set up my .htaccess file to redirect any http requests to the https version. This is usually done automatically by certbot during an automatic installation, and is embedded in the /etc/apache2/sites-available/000-default.conf file, but since I don't have access to this, .htaccess will have to do.

DMX for actual Electrical Engineers

So it's been coming up recently that our church media department has been buying "OpenDMX USB Dongles" for upwards of $80. I was mortified, especially after seeing this USB device, opening up the sheet metal project box and finding it to be a simple 2-stage USB to RS-485 protocol bridge with no programmable intelligence whatsoever.

During one church service, I counted out up the components in one of these boxes, along with the cost to manufacture around 12 PCBs from a 6"x6" dual-sided copper clad (including etching and tinning my own board), dumb down the expensive 5-pin connectors to a cheaper 3-pin (technically non-compliant according to ANSI, the agency that manages the DMX-512 standard that every designer is supposed to follow). The total cost of materials, given that my labor would be, along with everything else I do for the church media department, strictly volunteer-based, came to around $20 - a quarter of what it costs them to order the pre-made one.

And talking with the church employees, the lights themselves have not been acting right, and we're using such-and-such software from a computer to control them. Blah blah. On it goes.

Now these church employees ARE really smart. I mean, hey, they managed to set the entire network of DMX lights up, possibly with the help of a contracted expert, and have been training volunteers to program and control the network on the fly. But the terminology, and the lack of basic electronic knowledge has inspired me to make a write-up of what I've been learning lately.

Especially when last night I viewed THIS attrocity.

This just tells me that typical users simply don't know what in the world they're doing when they sink hundreds or even thousands of dollars into a system that requires the technical know-how of a digital electrical engineer.

Therefore I will see what I can do to write down my own experiences and discoveries and hopefully someone else can benefit.

Protocol

DMX is an 8-bit (technically 11-bit) digital protocol sent over a chained RS-485 bus to up to 512 slave devices. The DMX standard says that technically, only 48 devices can be chained directly together, but this can be expanded up to 512 by use of splitters and re-transmission. Also, the last device in a chain should be terminated with 120-Ohms.

This chain of devices is known as a "universe," but can be thought of as a bus.

RS-485 is the lowest level for bit control above which all modern-day networking is performed. In short, the base protocol that connects a computer to the internet via TCP/IP is the same protocol that connects a DMX controller (sometimes software within a computer) to a chain of DMX devices.

Addressing

A single physical device can consume any number of addresses (channels) off of the bus. Each device is physically programmed (probably with a 10-pin dip switch) with a start address after which its sub-devices simply count up from that number.

The controller is automatically given address 0.

A slave device (let's say a 4-color light with X-Y movement) is assigned in the controller with a start address and then consumes additional channels based on what it can do.

For example, an RGBW canister with X-Y movement could consume 6 channels - one for each color, one for the X stepper motor, and one for the Y stepper motor. The canister that my dad is currently working on fixing uses 7 channels. The additional channel is used for beam focusing with an additional stepper motor that moves a glass lens up and down in front of the light.

Therefore, in a controller, one can only assign devices to an address starting at 1. A second device should not be assigned to a channel that could be taken up by an already used channel, even if it is not explicitly allocated by the user, but instead has been taken up by a multi-channel device.

As in the example above, we could assign Light #1 (a 7-channel device) to Address 1. But a second light of the same type would need to be assigned to Address 8.

AddressDeviceFunction
0ControllerMain control of DMX512 bus
1Light 1Red Intensity
2Light 1Green Intensity
3Light 1Blue Intensity
4Light 1White Intensity
5Light 1X Stepper Position
6Light 1Y Stepper Position
7Light 1Focus Stepper Position
8Light 2Red Intensity
9Light 2Green Intensity
10Light 2Blue Intensity
11Light 2White Intensity
12Light 2X Stepper Position
13Light 2Y Stepper Position
14Light 2Focus Stepper Position

Wikipedia's oscilloscope picture has been instrumental in helping me understand the digital commands required. However, it was also confusing in that I did not understand that this was a simple UART packet transmission. It was only when I opened that $80 DMX bridge and looked it over that I realized the simplicity of being able to set up a master controller with software alone.

But in short, when a DMX packet is sent, it is initialized with a "break" (logical 0 a minimum of 92us long) followed by a "mark after break" (logical 1 a minimum of 8us long). This tells the devices chained on the bus that the bytes to follow should be counted from 1 to 512 in order, and that they will execute the byte value (from 0 to 255) for the channel(s) they consume.

One can send a partial packet, as long as the break and MAB is detected to reset the bus. A packet must be sent repeatedly or devices should enter a "reset" state. So if the bus master is turned off, all devices on the bus should stop functioning, turn off, or go into an idle mode.

Addresses versus Channels


It is important not to mix up the device bus positions (addresses/channels) with the controller sliders/knobs/adjustments you assign them to. Many hardware controllers make this especially confusing by also calling the sliders "channels" as well. In a controller's internal software, the user is supposed to first map all devices with their assigned addresses to slider channels that the controller itself defines internally.

With most controllers and controller software, it is possible to assign multiple hardware addresses to a single controller channel.

Controllers are ARBITRARILY PROGRAMMED

It is important to note that, like the video above, it is often misunderstood that a physical slider on a hardware controller will not always change the intensity of a light as one would expect to change the volume on an audio mixer. What happens for each value in each channel that a device uses is up to the slave device's manufacturer.

I had the nightmare of trying to figure out light control on a Zero 88 Fat Frog controller without first understanding that "what the device does is defined BY THE DEVICE!" That the programmer had taped over some button labels to define them as "smart lights" did not make sense because I had failed to read the user manual for the beam-shaping capability of the gobo canister hung on the rail in the ceiling. And I had no knowledge of what addresses they were assigned or what sliders they had been programmed to. Because what slider or knob or software adjustment does is defined by what address YOU assign it to control in regards to the devices connected to your bus.

This brings us to...

User Interface

When I started talking with people, and reading the DMX512 standard and related Wikipedia articles, I realized that MOST hardware controllers have defined a set of manufacturers and manufacturer devices so that the setup of a controller can be easy and straightforward. Simply tell the controller that on Address 16 a Chauvet EVE E-100Z and now it knows that it has the option to access the light on Address 16 for a single-channel dimmer or on Address 16, 17 and 18 for dimmer, strobe and dimmer speed mode. Then one simply assigns Chauvet EVE E-100Z addresses to slider 1, 2 and 3, or one assigns Slider 1 to Chauvet EVE E-100Z dimmer #1, #2, and #3 along with the Chauvet DJ SlimSTRIP UV-18 blacklight wall wash unit.

But what if your software or controller doesn't have these devices available in its repository of knowledge? If you know your device and you know your software, it should be extremely simple to just set up a general device in the configuration.

One only need tell the controller that "there is an unknown device that you should send a value to starting on Address 16 and consuming 17 and 18. These three channels you do not know what they'll do. Therefore, simply send a value from 0 to 255 when this slider is positioned just so."

I have a JANDS StageCL controller that I am able to play with on a weekly basis. A few months ago we went into the patch settings to see just how the DMX was set up. It turns out that someone had turned off control of a few of the white spots, and a few of the RGB washes had been shifted out to a different set of slider. This was all viewable in the patch settings. And a few of these devices were unknown to the controller's library, but we were able assign a simple RGB device which basically told the controller that "three addresses are consumed by one device to separate red, green and blue intensity." After that, the controller knew how to best utilize its own controls, such as color and saturation knobs and a fader that you patched the device to.

What was also interesting was the DMX monitor which simply showed the digital values that the controller was constantly pushing out to the bus. It showed nothing of the patching and slider controls. It only showed that we were sending WHATEVER was connected on address 301, 401 and 501 a value of 255. A single 255 could have been "full brightness of green" or it could have been "move x-axis stepper to 0 degrees."

Pragmatic Programming

Yesterday I was looking at software controllers - the cheap way of setting something up. In this case, you have no hardware that buffers commands to the bus, and are relying on your multi-threaded computer to ensure that a packet is transmitted every few milliseconds to prevent the bus from going into reset/idle mode.

My dad found one called Freestyler,which is highly rated for a freeware solution. However, he found that the device manufacturer had to be known by the software. Whether or not one could add an unknown device or define a known set of controls to the software was not researched.

I wanted something even simpler. So I found a very small utility on Sourceforge called Lights Up! Given that this was on Sourceforge, it was also no trouble to download the CVS repository and find out how the source code was constructed (and to fork and re-distribute it on Github). 

This is the most barebones example I've found so far, with 48 sliders that can be assigned to any number or combination of addresses. The only requirement is that an FTDI USB-to-UART chip be registered as a virtual COM port on the PC running the software. The author assumes that this means you have to spend that horrendous $70 on the Enttec OpenDMX USB dongle, but I found that plugging in a simple FTDI TTL-232R-5V-PCB that we use for talking to our A2D boards would suffice. After that it's a simple matter to re-buffer traffic from the RS-232 to RS-485 which is just a digital driver that ensures that you can run devices on a longer distance cable at higher currents.

Looking into the Lights Up! source code, I found that by using FTDI's C++ libraries and a intermediary "odmxusb" class library which handles the 513-byte packet, high priority threading and 30ms repeated transmission, I only need to build a 512-byte array of commands and send them into the data buffer of odmxusb. After that, everything is taken care of. That way, I can build whatever-the-heck user interface I want!

Summary

  • DMX is just an RS-485 UART with an electrical interface that chains up to 512 slave devices together.
  • All devices on the DMX bus read all traffic, but pick out the commands intended for them based on the byte order of the data stream and the address they are pre-programmed with.
  • Because of this a fancy DMX controller, however much of a user interface layer it's given, is at the lowest level, completely arbitrary and could be reconfigured to do Very Weird Things if the protocol is not understood.
  • I want to write my own software from a point near ground-level and work my way up.

A fun adventure in PGP

So I got curious about PGP keys and signing and encrypting using them. I managed to figure out how to use the semi-popular gpg4win (the standard windows port of GnuPG) with its built in Kleopatra GUI, Outlook add-ins and all the other fun stuff.

Using gpg from Kleopatra is much more convenient and automated than using gpg from, say, the command line, like many purists would probably recommend, just like the Git purists recommend only committing from the command line (even though the Git gui is way more convenient for diff and history, and so I continue to use it almost exclusively if possible).

Well, what I did not realize up until today was that running gpg from the command line was acting much MUCH differently than when I ran it from Kleopatra. But let's go back in history to describe what I did, what I discovered, and how I rectified the problems I found this morning.

- Getting my new work machine, I immediately installed Windows distribution of git core, which includes my favorite git-gui. This particular version of git (2.13.0.windows.1) completely overhauls the virtual machine folder structure so that rather than running git bash shell from ../Git/bin (a scaled down version of MinGW), it instead runs from ../Git/mingw64/bin/ and ../Git/usr/bin. But that's not the important thing to understand. Rather, what I really didn't understand is that git's mingw comes pre-packaged with gpg. But we're ignoring that so you can re-live my tale of headache.

- Move forward 2 months to when I want to explore gpg for the purposes of signing and encrypting documents, emails, other keys, etc. I installed gpg4win-3.0.0. Kleopatra is a great little gui! I import a few keys to check signatures on things like ubuntu iso files, the actual gpg4win-3.0.0 signature, one I found of a friend (which he confessed he doesn't use anymore). Over time, I accrue over ten keys in my list.

- A few weeks pass. I start reading more, and discover that you can sign git commits!!

Okay, so how do I do this? Well, what if I were to create a new master key and, like I saw a few people doing, label it as "CODE SIGNING KEY?" Sounds pretty reasonable. That I can do without a tutorial in Kleopatra!

Next I head over to https://git-scm.com/book/en/v2/Git-Tools-Signing-Your-Work. Perfect. I already have the key, but let me do those steps anyway.

From git bash, gpg --list-keys: No default key. Creating pubring.gpg and secring.gpg. Umm..that's odd. Shouldn't the one I just created in Kleopatra be there? Oh well. Let me try this gpg --import EDDD62B2.gpg, since I was careful a month ago to back up public, secret and revocation files. Tried the command again, okay, now it's there.

Changed a file, and from the bash shell, tried git commit -S -m "Test GPG signature": Enter your passphrase. Okay. Did it. Commited! YAY!

Okay, so this will be inconvenient to have to remember the "-S" bit every time I want to do something, plus, hey, if I want to use git-gui, there's no checkbox to sign a commit. Only to add a signature to the commit message (which I verified - "Sign your message" does not gpg sign the commit, even when one is available).

So how do I configure git to force-sign commits? Uhh http://lmgtfy.com/?q=git+force+gpg+signature

Oh this one looks good. Tried the instructions in https://stackoverflow.com/a/20628522/1265581 and sure enough, now git commit -m "Next test gpg signature (should be automatic)" totally asks for my passphrase, and git log --show-signature verifies the signature! Hooray!

So next step, does this work in git-gui? Tried it, uh...no. Big error (which I don't remember). Well, dang. So apparently, I can do all my diffs, my staging, and writing up the commit mess....no wait. Apparently git bash doesn't like a typical right-click/paste. So I have to open git-gui to stage and diff, and git bash AT THE SAME TIME to write the commit message and actually perform the commit. Well. That's not fun. But I'll do it.

- One more week later. I am now working on a hardware controller utility on my laptop. Time to get my secret keys transferred over so I can work from there. Obviously I want to see about getting the new git-gui installed too. Now I have git 1.9.5-preview20150319 installed as a 32-bit program, git 2.15.0.windows.1 installed as a 64-bit program (both of which I STILL did not yet realize had their own versions of gpg.exe). Also I had gpg4win-3.0.0 installed from before, to check whether or not emailing an encrypted message would work properly via the Outlook addin (which it did).

Set it up exactly like I had it on my desktop and....wait, now signing DOESN'T work? What's going on!? So now I'm subjecting myself to workarounds of transferring code via flash drive to a workstation that can properly sign the commits.

Plus I have not yet caught on that there's a reason why running gpg --list-keys is returning only my own keys, while Kleopatra shows over 20 in my list. And why I went through a huge bout of 'why in the world is it saying pubring is down in AppData when on my desktop they're all in ~/.gnupg, which I thought -I- created, but probably didn't?

- On to today. I want to sign and symmetric-encrypt a text document in plaintext (armor) format. While I can do all of the Right Click > Sign and Encrypt from my Windows context menus, it never gives me the armor option. But the binary gpg file it generates will totally decrypt fine in Kleopatra, so it should work in the command line, right?

So I try it in the command line via gpg --encrypt text.txt --armor --symmetric -o test.asc. Okay, this works fine. But then running decrypt from Kleopatra and I get "No valid OpenPGP data found." Uhh...why?

More Google, and I discover http://unix.ittoolbox.com/groups/technical-functional/shellscript-l/unable-to-decrypt-the-file-using-gpg-5012722 one, which offers (in my case) the workaround to add --force-mdc which is some security thing that my version isn't using by default? Well how do I make it by default? Add something to ~/.gnupg/gpg.conf? Well let me see..

It is at this point that something fires in my brain and I think, "wait... does my LAPTOP show all of my gpg keys? Sure enough, they do. All the ones I imported from Kleopatra are visible. But Git does not want to sign any commits with anything I have anyway. That means Kleopatra somehow is reading from its standard pubring (in ~/AppData/Roaming/GnuPG), where as gpg from the command line is reading the pubring from... ~/.gnupg/."

How do I force the command-line version to read from the pubring.kbx file instead of pubring.gpg? Research research research. Environment variables to switch databases...just creates an empty pubring.gpg in the location where pubring.kbx is located. No way I can make it read the kbx file that's already there??

At this point, I read somewhere that 'gpg 2 and up uses the kbx file format, where as versions lower than that use gpg. You will need to do this and this to merge them.' Well what's MY version? 1.4.21. But if I run "C:/Program Files (x86)/GnuPG/bin/gpg.exe" --version, I see 2.2.1! Ohh..so SOMETHING is forcing the Windows command line to use a different, OLDER copy of gpg.exe somewhere, probably out of my path.

A bit of research later and I discover that yes, indeed, Git has its own copy buried down inside of the program directories! Well, can I force git to use the gpg4win version? There's this command I can run to configure git to use it...but it doesn't seem to want to work.

What if I rename ../Git/usr/bin/gpg.exe to gpg.xex? Yep, THAT works then. Now both git bash shell and windows command line use C:/Program Files (x86)/GnuPG/gpg.exe, as does Kleopatra!

But will git sign commits properly? Let's give it a shot. Edit text file, git commit -S -m "Test commit." Asks for passkey. Success! Wonderful! Ooh though now I wonder... what would happen if I tried a commit in git-gui?

Open git-gui, change a file, save, rescan, stage, type message, I know that git is configured to force signatures, so let's just commit...aaaaand popup requesting passkey! EXCELLENT!!

Back out to windows command line and gpg --version. gpg 2.2.1. Excellent AGAIN!

Switch to my laptop. Rename gpg.exe to gpg.xex. And now it reads gpg 2.2.1 in both windows command line and bash shell on both computers! I'll write a blog post before I test whether or not it can now correctly sign commits.

That's a lot of code I've "example'd!"

Not to say it isn't useful. I certainly hope it is.

Oh and it's that time of year where I switch out blogger templates. Maybe this time I'll make it more straightforward and automated. Maybe.

Which reminds me: this is the first year that my MUSH will be auto-deploying its Christmas theme. Pretty excited for that!

Anyway, that's all for now.

USB Fast Chargers

I've been a bit confused lately at what constitutes fast charging versus normal charging, and why newer Android devices complain repeatedly if you use the wrong cable, or the wrong charger, or the wrong cable AND charger. How does it know?

Then I found an article on LifeHacker that partially explains it, but this comment thread clarified in an excellent manner: http://lifehacker.com/theres-a-bunch-of-misunderstanding-around-charging-via-1532885435

According to this article and the super helpful comment thread, the multiple things that affect an Android's ability to fast charge are:

  1. Battery current rating - I have a 3000mAh / 11.4Wh battery capacity (it is able to provide 3 amps at a nominal voltage for one hour or 11.4 Watts for one hour). P/I=V = 3.8V which is what this battery indicates it's able to deliver. This battery also has a minimum rating of 2940mAh / 11.2Wh (also 3.8V).
  2. USB Spec - Normally USB is supposed to output 5V +/- 0.25V. To convert from the 3.8V battery, we simply draw less current at the USB and convert it accordingly: (3.8V x 3A) = 11.4W. (11.4W / 5V) = 2.28A. So ideally my battery wants to present a current draw of 2.28A on the charger when acting as a load. With the 0.25V allowed voltage margin, this could be anywhere from 2.17A to 2.4A.
  3. A standard USB 2 port on a computer is rated only for 500mA (0.5A). If too many devices hang off of a USB port, you could start current limiting and the voltage to each device will drop, usually below the allowed 4.75V. This is why powered hubs are recommended. Even with a single device trying to draw more current than the port is capable of, this is when you get those errors that "your phone is charging slowly. Please use the charger and charging cable that came with your phone." A good charger should be able to provide all 2A needed for a standard charging rate the phone requires.
  4. Diameter of charging cable - USB 2.0 has five lines that it uses:
    • Rx
    • Tx
    • V+
    • V-
    • GND (braided shield)
    Normally the four main lines are all 28AWG. According to http://www.powerstream.com/Wire_Size.htm, this means that the charging lines will provide 0.23A before they start heating up and creating an appreciable resistance (higher than 213 Ohms per km) which will in essence place a second, noticeable load in series with the battery. The power lines (V+/V-) in the wire can be increased to 24AWG to allow 0.58A at 84.2 Ohms per km and thus decreasing this second parasitic load. Additionally, the load of the charging cable can also be reduced by shortening the cable itself.
    Gauge Test Current Impedance (per km) Wire length (km) (~6 feet) Cable Impedance
    28AWG 0.23 213 0.002 0.426
    24AWG 0.58 84.2 0.002 0.1684


    Volt drop (test) Voltage Left for Phone
    28AWG 0.09798 4.90202
    24AWG 0.097672 4.902328


    Volt drop (0.5A) Voltage Left for Phone
    28AWG 0.213 4.787
    24AWG 0.0842 4.9158


    Volt drop (2A) Voltage Left for Phone
    28AWG 0.852 4.148
    24AWG 0.3368 4.6632

    With a standard 0.5A charger, even a 28AWG 6-foot cable will be able to charge the phone at a standard voltage (4.79V being higher than the minimum allowed of 4.75V). However, if we wanted a full 2 Amps for fast charging, we would need a bigger cable (24AWG), which would even then present enough of a load to drop the voltage on the battery to 4.66V which, while better than 4.15V on the 28AWG wire, is still out of spec.
  5. Androids have the ability to detect a "fast charger." Fast chargers indicate their ability to provide 2A by a simple short between the unused Rx/Tx lines. If the android sees this "loop-back" connection on its data lines, it is programmed to assume that whatever its connected to is able to provide 2A. Otherwise it will only draw 0.5A.
  6. Additionally, some fast chargers which are paired with a standard length and gauge USB cable are able to do some rudimentary current sensing and output a voltage higher than 5.0V to compensate for the drop on the cable itself.

So in short, for a proper fast charger, two things should be used:
  1. A cable with higher diameter power lines
  2. A charger that is able to output the current required by the battery being charged

And an additional feature that could be desireable:
  • A charger that is able to sense the current, calculate the voltage drop across a known cable and boost its voltage output to compensate.

LetsEncrypt List of Useful Commands

Here are a few letsencrypt commands that I've found useful in the past few months of trying it out.

Installation:

git clone https://github.com/letsencrypt/letsencrypt
cd letsencrypt

Note: for a few Debian installations, you can also install with:
apt-get install letsencrypt python-letsencrypt-apache

Other OS's are also supported. See https://letsencrypt.readthedocs.org/en/latest/using.html#operating-system-packages for details!

Generating new keys on Apache:

./letsencrypt-auto run --apache -d domain1 -d domain2 -d domain3

Loading pre-generated keys from a backup into a new installation:

#Need to have backed up /etc/letsencrypt/ to some 
# backup location. This will grab private keys, 
# public certs, symlinks to them, everything.
# More help at https://letsencrypt.readthedocs.org/en/latest/using.html#where-are-my-certificates
#
#Simply running the command, even to load help, 
# will bootstrap dependency installations and set 
# up the Python scripts if they haven't been set up 
# already.
./letsencrypt-auto --help all

cp -R /path/to/backup/letsencrypt/* /etc/letsencrypt/

./letsencrypt-auto --install -d -d -d --cert-path /etc/letsencrypt/live/domain1/cert.pem --key-path /etc/letsencrypt/live/domain1/privkey.pem --fullchain-path /etc/letsencrypt/live/domain1/fullchain.pem

To renew keys (keeping them the same, but extending the expiration date another 90 days):

#Special bash scripts intended for datestamp 
# checking to refrain from renewing certs
# younger than 60 days old are no longer 
# needed in LE version 0.4. Simply run the 
# following:
./letsencrypt-auto renew

Typecasting struct to char* for idiots like me

Want to cast from a struct to a character string? Seen all those posts out there suggesting that reinterpret_cast will work, but is unsafe? Yeah, I tried it. Yeah, it's unsafe.

What about the ones saying you could just malloc()? Well, my own personal mantra says that direct memory manipulation is also rather unsafe if you don't count right or are not careful with stack memory and such. I have avoided malloc() like I have learned to avoid reinterpret_cast.

But just today I discovered a most elegant solution:

struct newStruct { //33 total bytes long
    int dw0;
    uint_16 s0, s1, s2, s3;
    float f0, f1, f2, f3;
    char b0;
    int i0;
};

void byteOperation(char *p) {
    // Treat input parameter "p" like a big character array and do things one byte at a time!!
}

newStruct v;
newStruct w[1];

byteOperation((char*)v); // Compiler error: Cannot cast from 'newStruct' to 'char *'
byteOperation((char*)w); // Will just work.


Embarcadero TThread Just Works

I've been annoyed for a large amount of time (years in fact) over some of our software we use and sell. In essence, what we have is a TCP GUI that communicates on a 250ms timer with a microcontroller that's serving up a two-way communications protocol over ModBus FC23 - we send commands either to write data to or read data from the unit.

The developer we had make the initial software for us decided to use Embarcadero's system timer object to control the 250ms polling. Not only that, but I had to put in an 8-second delay during socket initialization (via a TPing object) in the event that the unit was rebooted (we want to wait until the unit can finish booting before we say that it can't be found on the network). And I learned ALL of my Borland/Embarcadero, and even the majority of my C++ knowledge from this program and others I've patterned after it.

But both the timer and the timeout exist in the main method. So every time the TPing object waits for the unit's response, or every time the 250ms timer hung, the entire program would freeze. It's been very annoying to say the least.

The microcontroller library I use (Netburner uCOS) has a fairly straightforward way to set up "tasks," and particularly the MOD5282 has something called a periodic interrupt (PITR) which will run a very fast clock at some hardware-programmable rate that will set an IRQ interrupt flag (and hardware pin) every time it fires. These two things are really cool because not only do I have a very fast and very calibrated clock that I can run certain tasks on at a rapid rate, but I can do so within separate tasks which keep the entire program from freezing if set up correctly.

But it required a slight change in thinking. I cannot run intensive processing within the PITR (printf(), etc). I cannot use OSTimeDly(n) (essentially the Sleep() function of uCOS, which is also limited to 20ms minimum) within the PITR. And I cannot utilize critical sections or OSLock() for any more than a few essential operations at a time. Otherwise the watchdog timer of the microcontroller could hang and force it to reboot.

I also have to explicitly declare a task's stack memory on the Netburner and have to give each some priority to make sure that more important tasks continue to run properly.

Thing is, Netburner's documentation on Tasks is quite good once you know where to look.

Embarcadero's documentation is a bit more confusing.

Borland/Embarcadero uses something called the TThread class. I figured multithreading a GUI application would be simple - simply declare a "task," set it up to run by itself using numerous different parameters with timers and what-not. Not according to documentation.

According to documentation you have to set up an entirely separate TThread class and you have to Synchronize objects from the main form in order to change their values. And none of the example programs look very straightforward.

Of course, the only example program I have is some triple-sorting GUI with three threads other than the main one, each sorting a set of data with a different algorithm. Out of the box, it's really cool. You hit the button and watch the three bar graphs simultaneously sort themselves from high values to low values, some taking longer than others. A great example program.

But I don't do any sorting in my programs. All I WANT is to push a button in my GUI and have it attempt to connect to a remote unit for eight seconds without hanging. Meaning, if I know it's not there, I can simply push the disconnect button and cancel it. Or close the GUI completely because I realize I made some mistake in programming.

In short, MY need for multithreading exists on a much simpler level. I want to be able to interrupt something that would otherwise force me to wait, since it emulates the Sleep() function.

Then I figured it out. Threading is still my solution. Only getting it set up in the Embarcadero IDE is much much simpler than the scant documentation and example programs would lead you to believe.

Here's my example program:
1. Create a simple VCL form with a TLabel (or any other object that takes a String input and displays it).

2. Drop a TSpeedButton object, setting its GroupIndex to a positive integer (like 1) and setting its AllowAllUp property to true. Now we have a toggle switch.

3. Create a global bool variable and give it some name like "ThreadExecute."

4. Bind the OnClick event of the TSpeedButton to some function, namely its default "SpeedButton1Click(TObject *Sender)" and tell it to toggle the global boolean set in step 3 based on its Down boolean property:
void __fastcall TForm1::SpeedButton1Click(TObject *Sender) {
  // This ensures that the SpeedButton1->Down status is available globally for other things, such as the other thread.
  ThreadExecute = SpeedButton1->Down;
}

5. Now for the super simple part - File > New > Other > C++ Builder Files > Thread Object. This will create a new unit, a cpp and h file set with the same name that act like a single "unit" (hence the name) within the IDE. The class it automatically creates will be assigned to the TThread class type, just like the main form is assigned to the TForm class type. It will also create two default functions - a constructor for initializing internal variables or what-not when a TThread object of this class is created, and an Execute() function for when the thread is "started."

6. In the TThread::Execute() function, create some iterative process, like adding 1 to a number within an endless while loop:
int n = 0;

void __fastcall ThLooper::Execute() {
  // Note - A while(1) loop, particularly with a Sleep() delay at the end would most certainly freeze the main loop and make it unresponsive to any further user interaction.
  while (1) {
    // Only execute if Toggle button in the Main form is Down.
    if (ThreadExecute) {
      n++;
    }
    Sleep(250);  } // end while
}

7. In the main form, set up the TForm's constructor to initialize the Thread in its own object:
ThLooper *Thread1;
__fastcall TForm1::TForm1(TComponent *Owner) : TForm(Owner) {
  Thread1 = new ThLooper(true); // Note - the CreateSuspended parameter creates the Thread object without starting it automatically.
  Thread1->Start(); // Can also use Resume(). This is needed if the Thread was created with CreateSuspended == true.
}
8. We now will probably need to display the value of n in the main form. However note the comment in the Thread class file - "Methods and properties of objects in VCL can only be used in a method called using Synchronize." This means you must use the Synchronize() function in order to access Form1 objects like the Label we want to update the caption of:
int n = 0;
// Should declare this first. Can be done in the thread header file.
void __fastcall ThLooper::UpdateLabel(void);


void __fastcall ThLooper::Execute() {
  while (1) {
    if (ThreadExecute) {
      n++; // Note - we made this global to access it from a synchronize method call.
      Synchronize(&UpdateLabel);
    }
    Sleep(250);
  } // end while
}

void __fastcall ThLooper::UpdateLabel() {
  Form1->Label1->Caption = (String)"N=" + n;

}

And that's it! That's all I needed to do to set up a thread that runs a constant process that would normally freeze the program outright. I can start the timer, or stop it using the toggle button, but the endless while loop will not freeze any portion of the main thread.

Looking at the documentation, there are also properties for setting a thread's priority to low or high, set it to destroy itself on an exception, and numerous other things.

And my knowledge of Netburner tasks simply verifies what I already know when Embarcadero highlights the following things to be aware of:
1. Too many threads consumes CPU time - limit yourself to 16 threads per CPU processor.
2. If multiple threads access the same resources, they must be synchronized to avoid conflict.
3. Updates to the form must be limited to the main thread. Updating a form element from within a thread should be done via thread synchronization such as TMultiReadExclusiveWriteSynchronizer.

This subject is not as complex as I had first believed!

Official Documentation:

Example.h:

#ifndef ExampleH
#define ExampleH

#include
#include
#include
#include
#include

class TForm1 : public TForm {
__published:    // IDE-managed Components
    TLabel *Label1;
    TSpeedButton *SpeedButton1;
    void __fastcall SpeedButton1Click(TObject *Sender);
    void __fastcall FormShow(TObject *Sender);
private:    // User declarations
public:        // User declarations
    __fastcall TForm1(TComponent* Owner);
};

extern PACKAGE TForm1 *Form1;

#endif


Example.cpp:

#include
#pragma hdrstop

#include "Example.h"
#include "ThLooper.h"

#pragma package(smart_init)
#pragma resource "*.dfm"
TForm1 *Form1;
ThLooper *Looper;

__fastcall TForm1::TForm1(TComponent* Owner) : TForm(Owner) {
    Looper = new ThLooper(true); // Initially suspended. We don't want to risk updating VCL components before they are completely created.
}

void __fastcall TForm1::FormShow(TObject *Sender) {
    Looper->Start(); // VCL Form has been fully created. Can now start Looper thread.
}

void __fastcall TForm1::SpeedButton1Click(TObject *Sender) {
    Label1->Caption = (SpeedButton1->Down)?"Running":"Halted";
    Looper->Go = SpeedButton1->Down;
}


ThLooper.h:

#ifndef ThLooperH
#define ThLooperH
#include

class ThLooper : public TThread {
private:
  void __fastcall UpdateLabel(void);
  void __fastcall AnimateStatus(void);
protected:
  void __fastcall Execute();
public:
  __fastcall ThLooper(bool CreateSuspended);
  bool Go;
};

#endif


ThLooper.cpp:

#include
#pragma hdrstop

#include "Example.h" // To update VCL form elements.
#include "ThLooper.h"
#pragma package(smart_init)

// AnimateStatus is a quick little text-based progress bar I made.
char ConnAniCtr = 0;
char ConnAniMax = 4;
char ConnAniDelay = 2;
char ConnAniDelayCtr = 0;
String ConnAni = "";
short N = 0;
void __fastcall ThLooper::AnimateStatus() {
  if (ConnAniDelayCtr < ConnAniDelay)
    ConnAniDelayCtr++;
  else {
    ConnAniDelayCtr = 0;
    if (ConnAniCtr >= ConnAniMax)
      ConnAniCtr = 0;
    else
      ConnAniCtr++;
  } // if

  ConnAni = StringOfChar('.',ConnAniCtr);
  Synchronize(&UpdateLabel); // Synchronously update VCL Form Label.
}

__fastcall ThLooper::ThLooper(bool CreateSuspended) : TThread(CreateSuspended) {
    Go = false; // Do not run initially.
}

void __fastcall ThLooper::Execute() {
  while (1) {
    if (Go) {
        AnimateStatus();
        N++;
    }
    Sleep(250); // Can comment this to see max speed of thread. Synchronize does not significantly pause thread execution.
  }
}

void __fastcall ThLooper::UpdateLabel() {
  Form1->Label1->Caption = (String)"Running" + N + ConnAni;
}

PHP Access Control List

A quick little Access Control List (ACL) snippet I made for PHP/HTML. Enjoy!
<?php

$acl = array(
// Populate with IP/Subnet Mask pairs.
// Any zero bit in the subnet mask acts as a wildcard in the IP address check.
array("192.168.10.24","255.255.255.255"),
);

$acl_allow = false;
for ($i = 0; $i < count($acl); $i++) {
$ip2chk = (ip2long($acl[$i][0]) & ip2long($acl[$i][1]));

if ((ip2long($_SERVER['REMOTE_ADDR']) & $ip2chk) == $ip2chk) {
$acl_allow=true;
}
}

if ($acl_allow) {
// Put all test stuff here!! Only visible to ACL.
phpInfo();
} else {
echo "<a href='http://this-page-intentionally-left-blank.org/whythat.html' target='_blank'>This page intentionally left blank.</a>";
}

?>

Linux - find what is preventing you from unmounting a drive

Disclaimer: I've had this problem for probably four months, ever since I started running Plex Media Server on my headless linux machine at home, whilst storing all my actual media on a nice external portable drive. Usually I just yank it, but then I watch the drive letters run themselves up obscenely high before I need to reboot.
So you've gone through the process of mounting your drive in Linux:
> sudo fdisk -l
Device Boot = /dev/sdb1 (and a bunch of other technical information regarding drive size, id, and such)
>

> sudo mount -t ntfs-3g /dev/sdb1 /media/TOSHIBA
>

You run a bunch of stuff, get it all working, then find you need to take the drive to work the next day, so you try to unmount it.

 > sudo umount /media/TOSHIBA
umount: /media/TOSHIBA: device is busy.
(In some cases useful info about processes that use the device is found by lsof(8) or fuser(1))
>

Well, being a Windows guy at heart, and not really understanding why everything here needs to be so technical, this message never told me ANYTHING. I would try typing just plain "lsof" or "lsof(8)" or "fuser(1)" with no useful results.

Then I asked a friend.

"lsof | grep <stuff>," he said.

"Like, <stuff> would be the /dev/sdb1?"

"Yeah."

So I tried it:
> sudo lsof | grep /dev/sdb1
mount.ntf     2096      root     3u     BLK    8,33 0x1d1ba997e00       2897182   /dev/sdb1

"Oh," he said. "Try the mount path. /dev/sdb1 is the device which is mounted somewhere else."

> sudo lsof | grep /media/TOSHIBA
>

"Nothing," I said. "Just a blank line."

"Looks like no program has any file open on it?"

"Let me try again."

bash     2068     daniel    cwd    DIR    8,33     8192    17459  /media/TOSHIBA
grep     2254     root       cwd    DIR    8,33     8192     17459  /media/TOSHIBA
lsof     2255     root       cwd    DIR    8,33     8192     17459  /media/TOSHIBA

"Ahh...It may have been because I was still cd'd into it."

"Yes!"


So lessons learned:
  • grep, no matter how weird and complicated it looks with all those pipes and stuff, is still VERY useful. 
  • lsof is the command of choice for figuring this out. 
  • Use the mount point rather than the drive itself when searcing the lsof output text. 
  • Even just navigating into a drive will lock it from being unmounted - it's not like in Windows where if you "Safely Remove Hardware" or yank the USB cable, the computer conveniently closes the explorer window for you.

Pentax Camera Accessories - The Expensive Joy of Brand Loyalty


Last April, after months of researching and stressing over whether or not I should (or could), I finally bit the bullet and spent $1300 on a nice 24Mpx Pentax K-3 DSLR. This is a super camera that I really have been enjoying and getting some high quality photos with. Most of all I like the standard ability you get with any DSLR of a fully manual photograph, something you just don't get with a snapshot like my old Fujifilm A820. Sure the good snapshot cameras come with that little pseudo-manual exposure mode where you set one or two preferred manual settings and the rest remain automatic, but a nice DSLR will give you the ability to adjust everything about both exposure AND focus.

The one biggest drawback I've discovered with expensive DSLR cameras are the equally-as-expensive accessories. Sure, I can justify paying $400+ for a nicer lens, because I understand the need for accurately-ground and polished glass, spherical aberration, and the like to produce a decent to high-quality photo.

However, the minor accessories themselves are atrociously overpriced, especially for the Pentax brand.

To date, 8 months later, in addition to the two Wasabi-brand batteries+charger I felt were a good idea to have ($25), I am now a semi-proud owner of a second brand-name focusing screen ($45) (I didn't realize the camera already came with the exact one I ordered separately), a brand-name battery-grip ($125), a brand-name electronic cable release ($40), a brand-name flash-mountable GPS unit ($200), a brand-name K-mount to 42mm threaded adapter ($50), a 62mm Hoya circular polarizer ($70), a 62mm Hoya skylight filter ($35), and a 62mm Tiffen 0.3 neutral density filter ($26). Doing some quick calculator math because I'm too lazy to spend two minutes doing it in my head this brings my total cost for accessories that I've purchased in the last eight months to $616, which is an additional 60% of the cost of the camera itself (which came with a stock lens)!

Now the one thing that I don't have for this thing, which I probably ought to have if I want to do any of the long-term stuff I've already pushed my batteries to the limit with is the AC adapter. Except for one thing. The OEM AC adapter for the K-3 camera is a mindblowing $100.

Not only does the AC adapter use a somewhat-obscure Japanese connector - a Hirose H10485, but the voltage requirements (8.3V) for this camera are EXACTLY the same as that for the Pentax K10D for which a DIYer created a decent tutorial for a number of years ago, as well that of the K-5 which an eBay seller offered power supplies for a mere $16.

I've examined the K-3's AC connector and it looks exactly the same as previous models. Why then, for this model, did Pentax decide to create a completely new part number for yet another 'official' AC adapter and charge $100 for it when I can get what LOOKS like an equivalent for $16? Actually the only two questions regarding this that I have are:
  • Are the pinouts the same as on previous models (+8.3V on the connector's keyed pin, ground on the opposite end and unconnected in the middle)?
  • Is the current rating for the K-3's adapter for some reason higher than the 1.5A spec'd for the K10D? Why can't we just beef up this power supply to handle 2A? Or 2.5A?
The only reason I could see to paying the full $100 for a simple 8.3V DC power supply is that people don't want to risk plugging something whose material cost is less than $16 sold by a third party into their $1000+ camera when the $100 OEM version is guaranteed to work. Oh, and it keeps any warranty valid.

By the way, the cable release, which connects to the camera via a simple 2.5mm stereo headphone jack is the one of the simplest of DPST circuits: